CLICK HERE FOR FREE BLOGGER TEMPLATES, LINK BUTTONS AND MORE! »
Showing posts with label Tips. Show all posts

Wednesday, 20 May 2009

Ink Pad Storage For Stampin' Up Inks

Ooooh look what I got.....Very very excited when this parcel arrived this afternoon.... I know easily pleased...I love storage for stash and when the very naughty Clare showed me her new ink pad holder for her Stampin Up ink pads I knew I needed one!

I love Stampin Up ink pads but have been getting really annoyed with how to store them. I used to have them all stacked up ontop of each other but because they don't sit flat as soon as you tried to pull an ink pad out they fall over!

I have already broken one ink pad whlst trying to get to an ink pad, they fell onto the floor and (Elegant Eggplant) landed on it's corner and now it's cracked the case grrrrr!!

So if you are looking for a cheaper alternative to the Stampin Up storage which is in the UK catty I would highly recommend this one!

You can buy this from here


Saturday, 10 May 2008

Nestabilities Storage Tip!


I thought I'd share this with you... I love my nestabilities and used to store them in blank CD cases with magnetic paper inside. But I found that some of them weren't staying put in the cd case and would fall out which I found annoying!

Anyway whilst searching the internet I came across this idea and thought I'd give it a go... The folder is acutally for Quickuz Cookie Cutters, it's called a magnetic storage book... it will hold 8 sets of nestabilities perfectly in this little folder and the magnets are quite strong so no falling out!!! It's about A4 size and really slim so won't take up too much valuable craft space.
I bought mine from Crafts You Love, they have free P&P until midnight on Monday too... Am I tempting you LOL?! Here's the link just encase... it's right at the bottom you can get white or black http://www.craftsulove.co.uk/revolution_cookie.htm

Saturday, 26 January 2008

Nestabilities - Helpful Tips

Thought I would quickly share you some info on the Nestabilities that I found helpful before I was hooked!!!

Firstly this site is great guide to what they are, the sizing and how you can use them on the die cutting machine you have, not just the cuttlebug.

http://nicholeheady.typepad.com/capture_th..._faq/index.html

This video show's you how you use them in your cuttlebug... I found this really helpful, it's much easier to watch someone doing it rather than reading it.

http://video.google.com/videoplay?docid=-4...earch&plindex=0

OK so now you are tempted and want them?! The cheapest place in UK I found was Joanna Sheens website for £16.99 a set, plus you get free P&P, click on the link below and go to the bottom of the page!

http://www.joannasheen.co.uk/craft-supplies/wizard-embossing-cutting-system-dies/

Hope that's helped you out, Happy shopping lol!

Wednesday, 25 July 2007

Here's Some More Handy Tips For You

I wanted to share with you someone who I came across on the internet a few days ago, her name is Tammy Mitchell from The Scrap Spot... I sat down the other day to watch a few of her videos on on You Tube and was inspired by her!

If you have wondered what the crop-a-dile is like to use watch her video on it, it's very helpful... I especially enjoyed her ideas and techniques on covering chipboard with ribbon.

Anyway this is the link to madscrappergirl's videos ... enjoy!

http://www.youtube.com/user/madscrappergirl


Monday, 23 July 2007

Tips On Colouring Cuttlebug Embossing Folders

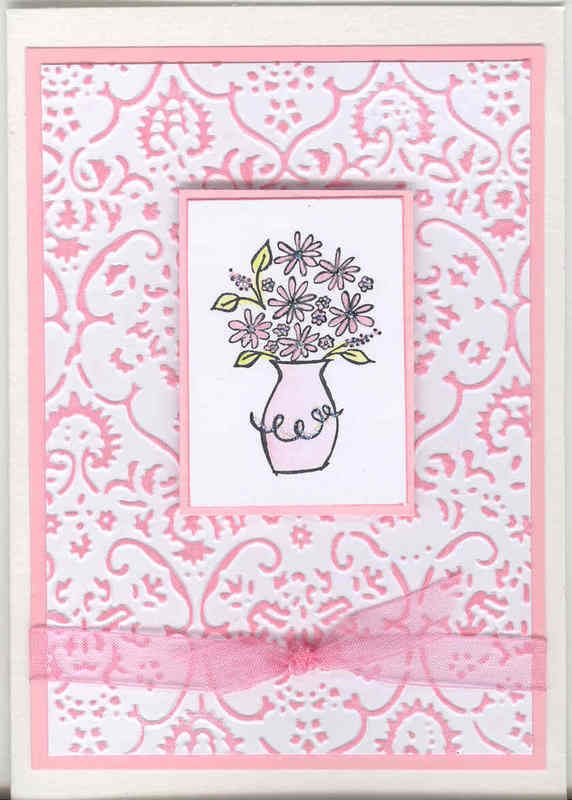
A few people have asked how I manage to colour the raised embossed parts of a cuttlebug emossed folder without it going on the main part of the card so I thought I'd give you my tips.

I've tried doing it with a number of different inkpads (as I seem to collect those too lol) but I have found that the larger inkpads work much better than the smaller ones like the Brilliance dew drops... I prefer to use the Brilliance larger inkpads as for me they seem to work the best... especially the pearlescent ones as they shimmer.

If you keep the embossed image on your craft mat and keep your inkpad staight and just rub over the image keeping the inkpad straight and try not to be too heavy handed with it... you should end up with a result like this opposite!